House of Rohl Solutions

2 Handle Thermostatic Valve Maintenance REP22-32-42 NEW

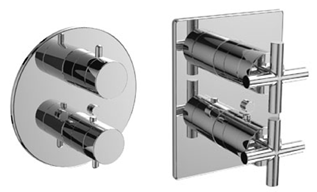
This article will explain how to clean or remove the cartridges and check valves on a thermostatic 2 handle valve (after Oct 2008)
clipboard_ec518629acc79cb0abe4668ca4428b39d.png
Preparation:

Important: Turn off the water supply at the faucet before starting. You can either turn off the main supply to the house or close the shut-off valves if the faucet is equipped with them. Then open the faucet again to empty it of residual water. Failure to do so could result in flooding or injury. The following instructions explain how to remove the temperature handle and trim plate for 3 valve models. If your shower valve is not similar and you don’t already have your valve part’s page, contact us

  • Recommended tools: Handle requires either a 2.5mm allen key or Phillips screwdriver, 16mm ratchet or 5/8", adjustable wrench
Instructions:
Clean or replace the thermostatic cartridge
clipboard_e1e47465eb18ad86496f6ce679200dac7.png
  1. Shut off the water supplies.
  2. Remove the handles. (Refer to the proper drawing for your type of handle ).
  3. Unscrew the sleeves (3).
  4. Remove the screw caps (6), the screws (5), and the decorative plate (4).
  5.  If you need to, turn off the check valves on the main valve.
  6. Unscrew the set screws (1). Temporarily reinstall the handle (e.g. 7) on the cartridge (2) and pull the cartridge out.
  7. Inspect the cartridge (2). If there are calcareous deposits in the cartridge, clean it with a vinegar and hot water solution.
  8. Put the cartridge (2) back in place. Moderately tighten set screws.
  9.  Adjust the temperature:

a. Open the water sources.

b. Insert the handle (e.g. 7) (without screw it).

c. Test the water temperature at one exit (shower, spout, etc...) Turn the handle to adjust to the desired water temperature (e.g. 7).

d. Remove the handle (e.g. 7).

  1. Reassemble the trim of the valve. Take care to position the stop button at twelve o'clock (upwards).
Clean or replace the check valve


clipboard_ec9df10376f206aeae8237331ad86e42a.png

Snag_e71af4c.png

  1. Shut off the water supplies.
  2. Unscrew the stop valves (3) of the thermostatic valve with a ratchet and a 5/8" (16 mm) socket. Be careful not to lose the spring (2) and the piston (1).
  3. Soak in a vinegar and hot water solution if there are calcareous deposits.
  4. Inspect the seats of the stop valves in the body of the valve. Make sure there is no debris.
  5. Reassemble the stop valves. Make sure the flat head screws inside the nut are entirely unscrewed.
  6. Open the water supplies
 

Contact Us:

Canadian ConsumersEmail or Call 1-866-473-8442

U.S. Consumers: Email or Call 1-800-777-9762