C7912 INSTRUCTIONS
C7912 Thermostatic Cartridge Replacement Instructions |
|
|
Tools Needed: Crescent Wrench, Phillips Screwdriver, Flat Blade or Straight Screwdriver, Pliers Shut water supply to the faucet off: Important: Turn off the water supply at the faucet before starting. You can either turn off the main supply to the house or close the shut-off valves if the faucet is equipped with them. Then open the faucet again to empty it of residual water. Failure to do so could result in flooding or injury. |
 |
|
Carefully remove the finished trim from the valve, and off the wall, by removing the two finished screws on the faceplate by rotating counterclockwise.
|
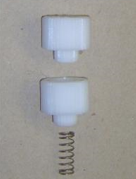
If applicable, remove the extension kit which consists of two white plastic adaptors with splines and one metal spring.
|
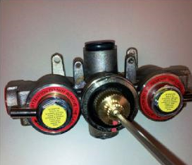
Using a Phillips screwdriver, remove the screw in the center of the brass adaptor with splines by rotating counterclockwise
|
|
Once the screw is removed, pull the brass adaptor off the stem of the cartridge.
|
Locate the two flat sides of the cartridge stem.
|
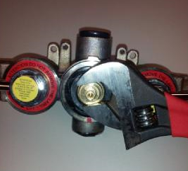
Using a crescent wrench on the flat sides of the cartridge stem, loosen the cartridge by rotating counterclockwise. The black plastic cover ring will come out with the cartridge. |


 |
Once loose, using pliers, pull the cartridge out of the valve. If there is some resistance, wiggle the cartridge back and forth to ease the cartridge out of the housing. |
Please ensure the screens and lines are flushed out prior to installation of the replacement cartridge. Failure to do so may cause malfunction in the replacement cartridge.
Install the replacement cartridge following the steps above in reverse.
Test the valve without the handle on. Using a temperature gauge, preset the cartridge at the desired temperature. Original factory setting is 100.4 0F.
 |